Sorry for the delay in my post, but it's finally here! For added tips and information before you start, you might want to check out the " What you need and General info " page at the top of the page.
The Tri Quad Stitch is tricky to learn, but it's one of the fastest to finish. Of course you'll need to choose your beads, depending on how big you want your piece to be.
 |
| Wood and Stone |
 |
| Rough Onyx & Moonstone |
CLICK "LEARN THIS STITCH" BELOW TO SEE HOW


I'll be using antiqued copper tone finding or components. Two split jump rings, two small open jump rings, a clasp and a short extender chain.

Thread your needle. You'll need to decide if you're going to double your thread or use a single strand. I'm going to double it.

I recommend sewing your split jump ring in with your first stitch; this doesn't work with all the stitches, but it saves you from having to re-thread if you can. Pick up 2 beads, then a jump ring, then 1 bead.You want to thread all the way through leaving enough of a "tail" to be able to tie with when you're finished.

Thread the needle through the first bead and pull tight.

You should have a triangle.
Thread the needle through the first bead and pull tight.
You should have a triangle.
Now, I always sew through this triangle once or twice depending on the hole size of my beads, for strength.

Before you pick up your next beads you will need to flip your triangle over to make sure your thread is coming UP through the bead. It doesn't really matter where the tail is positioned, in this case it is hanging down.
A tip to remember is pick up 2 beads you thread DOWN. Pick up 3 or more beads you thread UP.

Pick up 3 beads, thread UP through the same bead and pull tight.

This should give you a diamond shape.

Thread through the next two more beads so your thread is going down.

Pick up 2 beads, thread DOWN through the same bead and pull tight.

This will form another triangle.

Thread through 1 more bead so the thread is going up.

This is the tricky part; the size of your dangle bead will determine how many beads are required for this step. You want to use just enough beads to round the top of your dangle, to many beads and your bracelet will curve the wrong way.
For an 8 mm dangle bead (like mine) 3 beads will do. Slide them all the way down to your finished section. You do not thread yet.

Pick up 1 wood, 1 Tourmaline and 1 wood (for added contrast you can replace THESE wood beads with a different color bead, copper beads would be great with this bracelet , but I was going for simple). Thread UP through your bottom triangle bead PLUS the 3 wood beads you slid down. Threading a total of 4 beads. Pull tight.

You should have a semi-circle.

Pick up 2 beads, thread DOWN through the same bead and pull tight.

You should have another triangle. Thread through 1 more bead so your thread is going up.
Now you will be repeating the same steps.

Pick up 3 beads, thread UP through the same bead and pull tight.

You will have a diamond.

Thread through 2 more beads so your thread is going down.

Pick up 2 beads, thread DOWN through the same bead and pull tight.

You will have a triangle.Thread through one more bead so your thread is going up.

Once again pick up 3 beads, slide down to the finished section. Pick up 1 wood, 1 Tourmaline and 1 wood bead.Thread UP through the bottom triangle bead PLUS the 3 you slid down (total of 4 beads) and pull tight.
Repeat these steps until you have your desired length.

Don't forget to add a jump ring in between your last 2 beads you pick up.

Make sure when you cut your thread you leave yourself enough to be able to tie off.
I always double knot my ends and I like to put a little clear nail polish in the center of each knot before I tighten them down.
Now your ready to add your clasp and extender chain using your two small open jump rings.

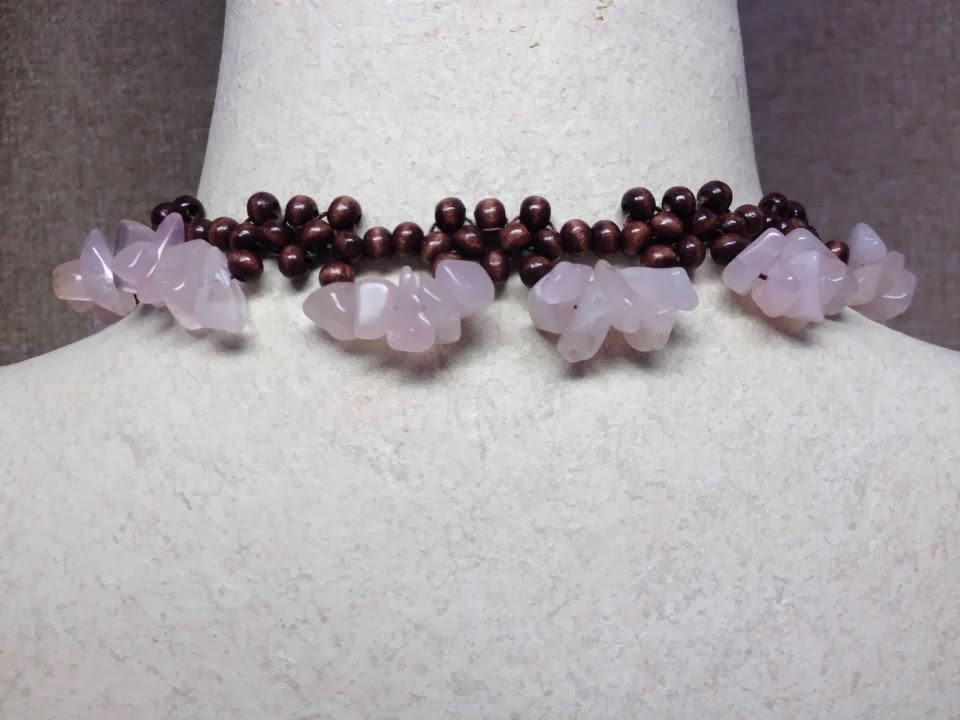
I hope this was easy to for you grasp. Please keep trying, if not. This stitch is great for bead chips and long necklaces with no clasps. Here's one made with 4 mm Wood and Rose Quartz chips.


THANK YOU SO MUCH for sharing your time with me. Make sure you share the fun. For purchases and ideas visit my website http://eyekandyjewelry.wix.com/handmadejewelry
No comments:
Post a Comment